English
 Arabic
 French
 Spanish
 Portuguese
 Deutsch
 Turkish
 Dutch
Dutch
 Italiano
 Russian
 Romaian
 Portuguese (Brazil)
 Greek
Greek
True Religion X Supreme Collection People Are Talking About
Shopping |
2026-07-13 10:51:16
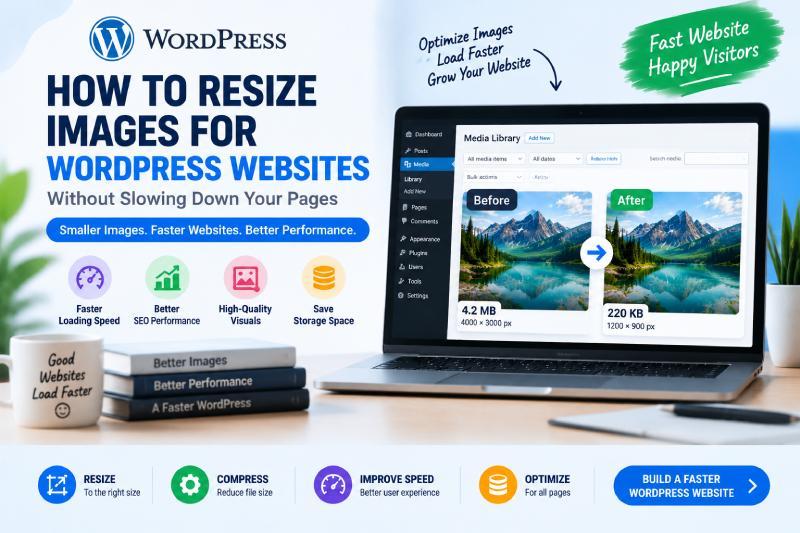
Images play an important role in every WordPress website. They make blog posts more engaging, improve product presentations, support branding, and help visitors understand content quickly. However, uploading large, unoptimized images is one of the most common reasons WordPress websites become slow.
A high-resolution image from a smartphone or professional camera may look excellent, but it often contains much more data than a website actually needs. When multiple large images are added to pages, galleries, and blog posts, they can increase loading time and affect the overall browsing experience.
The solution is proper image optimization. Using an image compressor online free tool helps website owners reduce unnecessary file size, optimize images before uploading, and maintain good visual quality.
WordPress users need to understand that image optimization is not about making every image as small as possible. It is about finding the right balance between image quality, file size, and website performance.
Whether you manage a blog, business website, portfolio, or online store, properly resized images can help create faster pages and a better experience for visitors.
Images are often the largest files loaded when someone visits a webpage.
A typical WordPress page may contain:
If these images are too large, the browser needs more time to download them.
Large image files can lead to:
For example, a single 5MB photograph may look perfect but can significantly slow down a blog page that only needs a 200KB optimized version.
Image optimization helps WordPress websites deliver better performance without removing the visual appeal of content.
A properly optimized image should:
Optimization usually involves:
These steps create a better balance between performance and appearance.
Many website owners upload images directly from cameras or smartphones.
Modern devices capture extremely detailed photos because they are designed for:
However, websites usually do not require such large files.
For example:
Original smartphone photo:
Optimized website image:
The visitor may see almost the same quality, but the website loads much faster.
One of the easiest ways to improve website speed is resizing images before adding them to WordPress.
When you resize image online, you can prepare images according to their actual purpose.
Examples:
Large enough for desktop displays but optimized for fast loading.
Clear enough for customers while maintaining efficient file sizes.
Wide images that fit the layout without unnecessary pixels.
Small images that should load instantly.
Using the correct dimensions prevents WordPress from handling oversized files.
There is no single image size that works for every website.
The ideal dimensions depend on where the image will appear.
Most blog images work well with:
This provides good quality without excessive file size.
Online stores often require:
depending on zoom and design requirements.
Large banners may require:
Small images should be much lighter because websites may load many of them together.
Many WordPress users search for ways to reduce image size online because they want faster pages without complicated editing software.
Reducing image size helps:
For example:
Before optimization:
Image size: 4MB
After optimization:
Image size: 250KB
The difference can have a major impact when multiple images appear on one page.
A common concern among website owners is quality loss.
Nobody wants website images to look:
The goal is to resize image without losing quality by keeping the details visitors actually notice.
For example:
A product image should maintain:
A blog image should maintain:
The best optimization approach reduces unnecessary data while preserving important visual information.
Many people confuse compression and resizing, but they solve different problems.
Resizing changes image dimensions.
Example:
4000 × 3000 pixels
becomes:
1200 × 900 pixels
Compression reduces the amount of data stored in the file.
Example:
3MB
becomes:
300KB
For WordPress websites, using both methods together usually creates better results.
An image compressor online free tool helps reduce file size while keeping images visually appealing.
Compression is useful when:
A good compression process helps websites load faster without making images appear poor.
For example:
Original:
1200 × 1200 pixels
1MB
After compression:
1200 × 1200 pixels
200KB
The dimensions remain the same while the file becomes lighter.
The image format affects website performance.
Best for:
Advantages:
Best for:
Disadvantages:
Best for:
Advantages:
Many WordPress websites now use WebP because it improves performance.
WordPress provides several ways to manage images.
Many websites use optimization plugins that can:
However, uploading properly resized images before using plugins can improve efficiency.
Plugins should support optimization, not replace good image preparation practices.
Website speed affects user experience and technical performance.
Large images can negatively influence metrics such as:
Optimized images help pages load faster and provide a smoother browsing experience.
For websites that depend on organic traffic, improving performance can support better technical SEO.
A large percentage of website visitors browse through smartphones.
Mobile users often experience:
Large images create bigger problems on mobile devices.
Optimized images help:
An image resizer and compressor combines two important optimization steps.
Website owners can:
This is especially useful for:
Many websites become slow because of simple image mistakes.
Camera images are usually much larger than required.
A small display area does not need a huge image.
Wrong formats can create unnecessary file weight.
Too much compression damages quality.
Existing media libraries may contain many unnecessary large files.
Bloggers often publish many articles with multiple images.
A good workflow includes:
This improves page speed while keeping articles visually attractive.
WooCommerce websites depend heavily on images.
Customers need clear product visuals, but large product catalogs can create performance issues.
Optimized product images help:
A store with hundreds of products can benefit greatly from a consistent resizing and compression workflow.
If a website already contains many large images, optimization can still be done.
Steps include:
Optimizing existing images can improve websites that have been running for years.
Some websites require images under specific file sizes.
Examples:
In these situations, users may need to resize image to specific KB.
The best approach is:
This ensures the image meets requirements without damaging appearance.
A simple workflow saves time.
Store high-quality originals separately.
Determine whether it is for:
Choose suitable dimensions.
Reduce unnecessary file size.
Use JPEG, PNG, or WebP appropriately.
Add optimized images to WordPress.
As websites become more visual, image optimization will become increasingly important.
Future improvements may include:
The focus will remain on delivering high-quality visuals with better website performance.
Images are essential for WordPress websites, but oversized files can slow down pages and affect user experience. The solution is not removing images but optimizing them properly.
Using an image compressor online free, resizing images before uploading, and choosing the right formats can significantly improve website performance.
Whether you need to reduce image size online, resize image online, or resize image without losing quality, proper image optimization helps create faster and more efficient websites.
A well-optimized image keeps visitors engaged, improves browsing speed, and allows WordPress websites to deliver high-quality visuals without unnecessary loading delays.